

I've continued being busy with lots of little things today.
Fun With Foliage
My clump foliage trials have been progressing. The batch I made yesterday is still drying.

Early this afternoon I got the test batches done that I mentioned yesterday. I had decided to add an "Urban Jungle" test batch to the three colours I had originally planned. While I was mixing up the "Botanical Garden" batch I thought I'd try adding a little squirt of Burnt Umber craft paint to mute the colour a little. A tiny squirt had a massive effect, so I had to add some more of the green. As I still had plenty of shredded foam I also did a straight-up "Botanical Garden" batch.


This evening, I decided to use up the rest of the shredded foam to do some batches with craft acrylic paints:
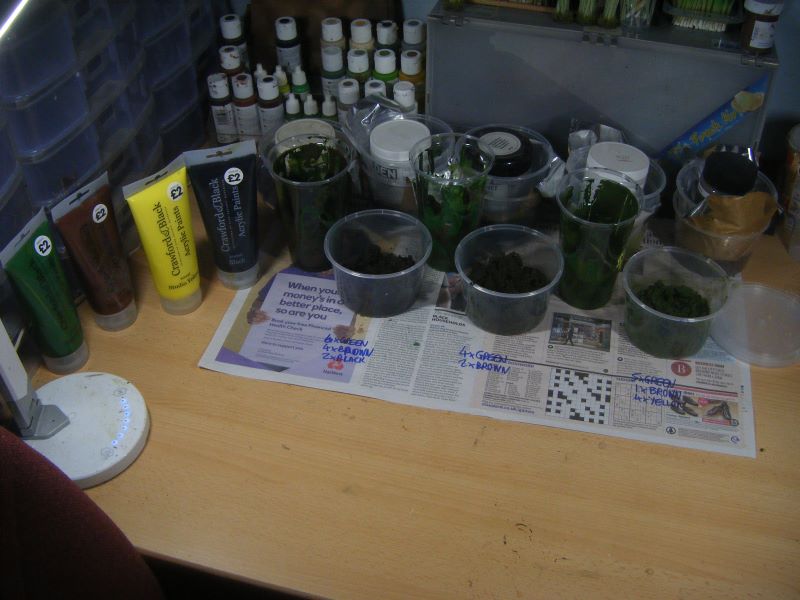

I've been chopping up some more foam this evening, ready to be shredded at some point.
Tamsin's Tips
If you are using kitchen or car sponges, soak them then wring out most of the water before cutting and ripping them up - the dampness kills the static so you don't get bits flying around and sticking to you.
"Underbrush"
As well as the coir basket liner bits, I also cut up some rubberised horsehair.I spray primed them all this afternoon. To make that job a little bit easier, I first coated some MDF sheets (the backing boards from cheap photo frames) with spraymount adhesive and stuck the pieces to them:

I didn't have quite enough space to do them all, so after the first batch had been sprayed I did the remaining coir bundles as a separate batch. This is how they looked after spraying:


I think the coir bunches look more natural than the rubberised horsehair ones. I will probably need a lot more, but I've got plenty of the basket liner left (and I can easily get more of those from Poundland if needed).
Goodies Received

Just some static grass. Six of the packs were for ones I am nearly running out of. I also bought some 1mm packs for a particular reason, which you might find out about this week. They'll also be useful for any 6mm projects I might do in the future.
Plantation Testing
One type of terrain I will need to make up is plantations - banana, rubber and palm (coconut and oil). Using the guidelines from the Malaya campaign in one the Lardies' specials, each plantation needs to be 18" - 24" square (or equivalent); you can also have several areas of plantation. I decided to do a test layout to see what density of trees would look best and still be playable.
I began by gridding up some of the Terrain Tiles I received yesterday from Sarissa Precision.

At this point, after about an hour of penciling in lines, I realised my big mistake - I'd have to drill a lot of holes to hold the trees and this was only for a layout trial! I quickly cut out and gridded up a 30cm square of 10mm blue foam. I then grabbed some figures and some trees and took some photos at various densities:
Palm Trees:


It's all your fault! As a result of all these posts about terrain work you've nudged me into some (much smaller scale) work of my own.
ReplyDeleteYesterday I dry brushed some old TSS polystyrene hills with emulsion paint from Wilko's tester pots. Very therapeutic and the hills look great. They are so old the colour had gone. They went from autumn to summer.
The day before I was cutting terrain bases out of "Fab Foam" sheets because I'd just realised that in ADLG villages, fields & plantations must be rectangular terrain pieces. Who knew?
Keep up the good work.
I'm quite happy to take the blame for inspiring you to do some terrain work of your own!
DeleteYou're not alone on not spotting that villages etc have to be rectangular in ADLG - it was quite a while before we spotted that at CLWC.
Excellent progress Tamsin, you should label these terrain posts as Master class, as they are so good
ReplyDeleteThanks! Not sure that these count as "master class" as they are just me experimenting right now.
Delete