A mythical beast - a female wargamer!
I got back into wargaming in the summer of 2011 after a very, very long break and haven't looked back since. I must admit that I seem to be more of a painter/collector than a gamer, but do hope to correct that at some point in the near future.
My gaming interests span the ages, from the "Biblical" era all the way through to the far future. I enjoy games of all sizes, from a handful of figures up to major battles (see my megalomaniacally sized Choson Korean and Russian Seven Years War armies).
OK, that's it. No more additions to my WW2 Australians...
Engineers (Brigade Games)
Flamethrower team
Mine clearance team
These figures are a touch smaller than the other Aussies in my collection, but not too badly. Luckily, I don't need to add any more. The two chaps with Owen guns can also be used as infantry (as if I don't have enough already!).
Forward Observer Team (Warlord Games)
As I only need to represent the FOO in CoC, I based the other two figures separately so that I can use them as additional crew figures for support weapons.
Papuan Infantry and Porters (Brigade Games)
The sculpts for these aren't as nice as the ones from Warlord and Eureka. They're also a touch smaller, but that isn't a problem.
Kangaroos (Eureka Miniatures)
I chanced upon these figures while browsing for other animals and just had to buy them to use as CoC jump off points for my Aussies. Or as wildlife for games set in Australia, should I ever play any. I particularly liked the female with the Joey in her pouch:
Looking at the close-up pics, I think they might benefit from a light grey wash to smooth out the final bit of brown-grey stippling I did.
Normal service will be resuming now that my Arnhem 75th series of posts has come to an end. There were so many little tidbits that I could have added, but didn't in the end, that I might do another post with them.
However, this is meant to be a workbench post, so I'd better get on with showing you some stuff that I've been working on.
In my Wednesday morning post, you will have seen that I had finished painting some Aussies and Papuans, with some kangaroos about to be painted. I didn't do anything on Wednesday as I had the sniffles, but got the 'roos painted yesterday. This morning I airbrushed them all with a coat of Klear, then added basing texture this afternoon.
Tomorrow, the bases will be painted, washed, and dry-brushed; the figures will then get a coat of matt varnish and tufts will be added.
During one of the sunny breaks between heavy showers this morning I quickly headed outside to spray can prime the second batch of nylon scourer hedges. I'll flock them at some point; this was just to get them ready to go. I had decided not to do any trimming as they are short hedges.
I've got some other bits that need spray can priming, but I will leave those until there is a no-rain day.
As I don't have any more "quick wins" waiting in the wings, next week will see me start work on my Paras. There are 120 of them, plus two artillery pieces and 13 seated vehicle crew figures. Plus a few more figures and jeeps that haven't been prepped yet, and maybe a few more to come. I think that should keep me going for a few weeks.
On Tuesday 26th September 1944, those members of the squadron were reunited with the seaborne tail in Nijmegen. They were able to recover their spare uniforms, sleeping bags and other kit. Personnel were still reporting in on Wednesday 27th September.
On Thursday 28th September, the squadron moved to Louvain, spending the night in a monastery on the road to Brussels. They were flown back to england the following day, landing at Saltby in Lincolnshire. Trucks took them from there to the squadron's "home" at Ruskington where, after a brief rest, they were to begin reorganising.
Captain Costeloe, the squadron's adjutant, found that he was the senior officer among the returnees as Captain Allsop had been badly wounded during the Rhine crossing. The onerous duty of writing to next of kin fell to him, as did making recommendations for medals and awards. He had no experience with this, and received no help from the Division. He felt that the small number of medals and awards made to squadron personnel did not truly reflect their performance, and that Major Gough would have done a much better job if he had been present. As a quick note, after the German surrender and release of POWs, Major Gough was able to make some award recommendations for members of his party at the bridge in Arnhem.
On with the gongs. In case you are wondering why some received Dutch or US awards, there was a reciprocal arrangement in place for a small proportion of foreign awards to be made; all of those receiving these had originally been recommended for an equivalent "home" award.
British Awards
British Empire Medal
Sergeant Henry Venes
Military Cross
Lieutenant Douglas Galbraith
"The above mentioned officer at ARNHEM took over command of "A" Troop 1st Airborne Recce Squadron on the night of 21st September 1944, his Troop Commander having been wounded. The task of the Troop was to hold a line of houses on the north of the perimeter. His troop were continuously attacked by infantry and self-propelled guns, but the position was still held. On 25th September 1944 one of his sections was forced to withdraw owing to the intense bombardment Lieutenant Galbraith rallied his Troop and led them into an assault to retake the house. Amidst intense mortar fire and severe sniping, Lieutenant Galbraith rushed up to the house throwing 30 grenades on the windows. The house was retaken and held. Throughout the whole of the action at Arnhem, Lieutenant Galbraith was outstanding in leadership and maintenance of his objective."
Military Medal
Sergeant James Pyper
"At Arnhem on Saturday 23rd September 1944, Sergeant Pyper was defending a house with 4 men on the north side of the Divisional defensive perimeter. His house was attacked by a Self-Propelled Gun firing 88mm shells. The house was demolished by this gun, 2 of his men being badly wounded. Under intense small arms and mortar fire Sergeant Pyper got back to his Troop Headquarters to ask for stretcher bearers. He then returned to the house himself and started to get the wounded out. Still under heavy fire he carried the two wounded men to safety when he was met by stretcher bearers.
"On Sunday 24th September 1944, Sergeant Pyper's troop, finding it impossible to remain in houses owing to fire from Self-Propelled Guns, dug in in front of their house in the garden. In the evening a direct hit from a heavy mortar killed his Troop Commander and the other remaining officer and one other rank. Before Sergeant Pyper had time to recover from the explosion, his rifle having been blown some 30 yards away with the blast, a German section descended upon the remaining men of his troop from the garden next door. They were taken prisoner and escorted back to a German occupied house. That night with myself {Captain J. G. Costeloe} and six men Sergeant Pyper escaped to a neighbouring house where we laid up until the following evening. We had had no food and water for 48 hours. By this time we were completely surrounded and had little idea where our own troop were situated. However Sergeant Pyper after consulting his men, decided to make an effort to rejoin his own troop, by splitting up into pairs and moving off at intervals. Sergeant Pyper broke through the German defences under very heavy fire and sniping and crawled to the area of Divisional Headquarters. Here we laid up for some 20 minutes before we were certain that the house occupied by Divisional Headquarters was still in our hands. We were then told that the Division was withdrawing and made our way down to the river. Throughout the whole of the Arnhem action, Sergeant Pyper was an inspiration to the men and Officers of his troop. His conduct and steadiness under fire was of the highest order."
Mentioned in Despatches
Lieutenant FW Ladds
Sgt George Kay
"After being wounded during the fighting at Oosterbeek, Holland, on 18th September 1944, Kay was taken to various dressing stations, and six days later he was captured with other wounded. Almost immediately Kay tried to escape into the woods but was caught before he had gone far. He made a similarly abortive attempt the same day. On 26th September 1944 he was entrained at Apeldoorn for transfer to Germany. One of the occupants of the truck succeeded in cutting a hole in the side, thus enabling them to unfasten the door; four men, including Kay, jumped from the rapidly moving train near Teuge. They soon came into the hands of friends and were hidden until their evacuation with other escapers was arranged. Safety was reached on 24th October 1944."
Dutch Awards
Bronzen Leeuw (Bronze Lion)
Captain David Allsop
"At Arnhem, this officer took over command of the Reconnaissance Squadron after his Commander had become a casualty. From the time the Divisional perimeter was formed on the 20th September until the positions were evacuated, the squadron under the leadership of Captain Allsop was always where the fighting was thickest.
The initiative and resource shown by this officer was quite outstanding and the excellence of his leadership both then and during the subsequent withdrawal enabled a large proportion of his men to be evacuated. During this withdrawal Captain Allsop was wounded in two places but in spite of this he managed to make his own way across the river.
This officers gallantry, fearless leadership and devotion to duty were outstanding."
Bronzen Kruis (Bronze Cross)
Captain Thomas Douglas Victor Swinscow
"At Arnhem on 17th September 1944 9 Section C Troop had 3 wounded men lying out some 50 yards in front of a wood. Very heavy enemy machine gun and mortar fire was coming from the wood opposite only 300 yards away. Under withering fire the Medical Officer went out with 2 stretcher bearers to the wounded men. He treated the first and then despatched him with the stretcher bearers. He remained himself with the other wounded man still under heavy fire until the stretcher bearers return. During this time the Medical Officer was hit himself in the back. Having no regard for his personal safety he helped the second wounded man on to the stretcher and got him safely back to the wood. This Officers devotion to duty and personal gallantry was outstanding."
Trooper Charles Cecil Bolton
"On the night of September 17th 1944, Trooper Bolton was serving as Bren Gunner in a composite company guarding the road bridge at Arnhem. He was posted in a very exposed position in order effectively to cover the causeway and approaches to the bridge. He was continuously at his post day and night until September 20th when this force was recalled to Brigade Headquarters.
It was largely due to the extreme accuracy of fire and coolness of this soldier that continuous attacks by the enemy were repulsed. He was always finding targets and used his weapon with devastating results. Throughout the action this soldiers cheerfulness, steadfastness and utter disregard of his own personal safety had the greatest effect upon the morale of all ranks."
US Awards
Distinguished Service Cross
Lance Corporal Francis Mann
"At Arnhem on 21st September 1944, Trooper Mann was detailed to take a P.I.A.T. up to 156 Battalion area as it was reported that a Self-Propelled Gun was moving up towards them. Eventually the Self-Propelled Gun was spotted. Trooper Mann crawled to within 50 yards of the vehicle with his P.I.A.T. With his first bomb he knocked out the tracked vehicle. The gun on the vehicle was still in action then opened fire at point blank range on Trooper Mann who was completely buried in his slit trench, by a double hit. However, he managed to get out under heavy fire and with great determination make his way back to Headquarters 156 Battalion where he reported to Major Powell. As a result of this act of outstanding bravery by Trooper Mann, the Self-Propelled Gun was eventually abandoned by the enemy and the position consolidated."
Bronze Star
Lieutenant John Graham Hilton Wadworth
"At Arnhem on 20th September 1944 the situation on the north side of the perimeter had become confused. Detachments of the 156th Battalion and King's Own Scottish Borderers Battalion were said to be holding strong points south of the railway. Lieutenant Wadsworth was detailed to take two men and contact these two units. He went out in the morning walking around the right flank. He met heavy opposition and after a fierce grenade battle in which he displayed great courage, withdrew to make a second attempt round the left flank. He led the patrol skilfully, avoiding numerous pockets of enemy resistance and under continuous sniper fire, to the units concerned getting the required information and giving them a message from Brigadier Hackett. He returned with all the information required late that evening. Throughout the action Lieutenant Wadsworth was an inspiration to his section.
And now for the butcher's bill. I'm going to show the overall numbers first, and a breakdown by troop. These figures are for the 199 men who landed on 17th and 18th September 1944, including Major Gough's bridge party (I'll add a note about them at the end). There is some overlap between categories, so I'll include some notes where appropriate.
Squadron Totals
Killed In Action (KIA) - 26 total
2 Captains, 5 Lieutenants, 1 Staff Sergeant, 2 Corporals, 2 Lance Corporals, 14 Troopers *I've included Lance Corporal R Potts who died of wounds on 13th November 1944 at the German military hospital in Apeldoorn. He had been severely wounded by Messerschmidts strafing one of the landing zones where he was assisting the third landing.
Wounded in Action (WIA) - 74 Total
4 Captains, 4 Lieutenants, 1 Squadron Sergeant Major, 5 Sergeants, 3 Lance Sergeants, 2 Corporals, 8 Lance Corporals, 47 Troopers *Of these, 58 became POWs, the other 16 were evacuated across the Rhine
Prisoners of War (POW) - 93 Total
1 Major, 3 Captains, 6 Lieutenants, 1 Squadron Sergeant Major, 5 Sergeants, 2 Lance Sergeants, 3 Corporals, 9 Lance Corporals, 63 Troopers (includes 2 RAMC Privates and 1 REME Craftsman) *This includes the 58 WIA listed above. Three POWs managed to escape - Lieutenant Guthrie, Sergeant Kay and Trooper Crowder; the latter pair were recovered by Operation Pegasus I.
Recovered Across the Rhine (RAR) - 80 Total
4 Captains, 6 Lieutenants, 6 Sergeants, 5 Lance Sergeants, 6 Corporals, 6 Lance Corporals, 47 Troopers *This includes 16 WIA
SHQ and HQ Troop (59 total; 12 Officers, 47 Other Ranks)
Of the eleven members of the party, 10 are listed as POWs (1 Major, 1 Captain, 1 Lieutenant, 1 Corporal, 6 Troopers, of whom 5 were WIA). The eleventh member, Trooper J Woods, is listed as WIA and RAR; it may be that his listing is an error or that he somehow evaded capture and got across the Rhine.
On 22nd September, the Provost Section of 10th SS Panzer Division began the evacuation of prisoners from Arnhem bridge. Major Gough was in the back of a truck carrying about 20 officers (including Captain Platt and Lt McNabb) and about 30 other ranks. There were two Luftwaffe guards in the back of the truck, two SS men in the cab and an SS guard with an MP40 on the running board.
As the truck slowed to round a bend, Major Hibbert (Brigade Major, 1st Parachute Brigade) and Major Mumford (3 Battery, 1st Airlanding Light Regiment, Royal Artillery) decided to make a jump for it. They were seen jumping by a SS vehicle coming the other way, who signaled to the truck's SS men. The oncoming vehicles's occupants dismounted and some gave chase to the escaping prisoners. One, joined by the SS guard from the running board approached the back of the truck, pointed their MP40s and both emptied full magazines into the occupants.Three prisoners (Captain Platt, an officer from the GPR and one OR) as well as one of the Luftwaffe guards were killed immediately. Three others later died of their wounds, including Lieutenant Mc Nabb (on 27th September) and Major Cotterell, the official War Office correspondent. Others were wounded.
The SS men then began to order the POWS off the truck and to sit in a circle, hands on heads; they were joined by Major Mumford who hadn't got very far (Major Hibbert did manage to evade capture and helped organise Operation Pegasus I). The SS men were very agitated and it looked as though they were going to kill all the prisoners. Fortunately an officer from the Intelligence Service, who spoke very good English, arrived on the scene and calmed the SS men down. He ordered that the prisoners be loaded onto another truck, along with the dead and wounded, and that they should be taken on to their destination.
Major Gough, as ranking officer present on the truck, gave witness evidence of this incident to the War Crimes Tribunal.
For this penultimate post of the series, I will be covering the final day and night of Market Garden for the Recce Squadron.
Monday 25th September 1944
A Troop
0730 - enemy patrols dominate the area, intense fire from rifles and MGs. Germans use bundled grenades against house causing two casualties.
0900 - Lt Galbraith orders troops out of house into trenches dug the previous night.
1500 - Troop ordered by 4 Para Bde to withdraw to house near Hartenstein; regroup there at 1530 in mixed party with some glider pilots.
1600 - receive orders for withdrawal across Rhine* that night. At 1730 Sgt Venes sent to bring in 156 Para. They arrive at 1900.
2000 - thin out and report to 4 Para Bde. Start moving out towards Rhine at 2045. £ casualties sustained on the way.
* The war diaries consistently refer to it as the Lek; the river doesn't become the Lek until it splits some distance west of Arnhem; in this area it is still the Nederrijn (Lower Rhine).
D Troop
The remnants of the Troop were still in hiding. In the evening a conference is held - decide to make a break for it in pairs and attempt to reach own lines.
2000 - Sgts Pyper and Bentall lead the way out. At 2130 they make contact with some glider pilots on their way to the river and are informed about the evacuation. No sign of the others.
0200 on 26th - the two Sergeants cross the river.
HQ and Support Troop
0500 - sheeting rain, miserable.
0630 - "Still rain. Plenty of MG fire and a few mortar bombs thrown in to liven things up."
0900 - heaviest mortar fire so far, 50 or more bombs per 100 yards square.
0935 -lull in barrage as Typhoons come overhead.
1030 - uncanny silence, no sound of birds.
1035 - mortar barrage resumes.
1200 - Typhoons return.
1300 - flak guns add to the barrage.
1415 - Typhoons back again; Germans put their toys down.
1500 - mortars again, heavier than before "he must not like Typhoons he is so vicious". This inflicts a lot of OR casualties.
1730 - large force of Typhoons active above Oosterbeek.
1815 - as Typhoons depart "spiteful mortar barrage" comes in, joined by flak and MGs
1850 - Typhoons are back; Germans discontinue barrage for the day.
1930 - informed of evacuation plan; told to leave positions at 2050. "comes as a surprise - but not an unpleasant one"
2000 - troops warned
2030 - Division supplies some rations - 1 bar of chocolate and small packet of biscuits per man, tin of stew between 2 men.
2050 - barrage by guns of XXX Corps begins, drowning out most noise Move out in 4 sections led by Lt collier, Lt Lickorish, Captain Allsop and Captain Costeloe; route is mainly through woodland.
All four sections had similar experiences on their way down, and all took some casualties. There was sporadic MG fire at points, mostly on fixed lines, occasional mortar fire. One group ran into a German MG point on the way, SQMS S/Sgt Holderness was killed in this encounter. Everyone else made it to the river eventually and crossed to the south bank. Once over, they were guided to Driel where they were given hot drinks, some food and blankets. At some point they were transported or to various accommodations in Nijmegen where they got more tea, more food and were able to bed down and sleep, have a shower/wash and shave.
The second part of today's post will include a list of "Further Reading"
Sunday 24th September 1944
HQ and Support Troop
0630 "The ground shakes like jelly" from the morning "hate". Bombs and shells are incomign from all direction. There is a lull from 0930-1015, after which it is the most intense yet. German voices clearly heard nearby.
1415 - RAF typhoons overhead (for the first time) attacking targets on the ground, causing the mortar barrage to cease for a while.
1530 - barrage resumes "...and we settle down for another caress."
1545 - another lull in the barrage as a SP gun supported by infantry appears in the nearby woods. Engaged and driven away, but not before it fires some shells very close to positions.
1630 - the squadron's control wireless, which Lt Ladds has been nursing for the past few days, is hit by MG fire. Lt Ladds tries, but fails, to repair it while being fired at by the MG; all radio comms are cut.
1700 - very heavy MG fire from woods and some mortar fire from right flank. MG is engaged, but cannot locate mortar. Mg ceases at 1830 and the main barrage resumes.
1930 - no radio contact with Troops or Divisional HQ. Still heavy rain.
A Troop
0100 - Lt Galbratih site weapon pits in gardens and sections dig in.
0630 - morning barrage opens up. Germans infiltrating area all morning; cannot move in positions. Strong enemy attack in the afternoon is repulsed with heavy casualties inflicted for one casualty in own ranks.
D Troop
0700 - water gathering patrol driven back by MG fire. Germans infiltrating positions leading to many small skirmishes.
1000 - more German patrols of varying strength engaged an driven back.
1130 - heavy attack supported by "terrific mortar fire". Captain Park, Lt Pascal and Trooper Walker in same slit trench fail to duck in time as a mortar bomb comes in. All three are decapitated by the blast and shrapnel.
1300 - very strong attack closes in on positions. Sgts Pyper and Bentall plus 4 men have run out of ammunition and are forced to withdraw to another house, where they go into hiding. All positions surrounded and it is impossible to move out.
Sgt Pyper's party actually hid in a cellar underneath a pile of potatoes.
Further Reading
1st Airborne Reconnaissance Squadron
Fairley, John - "Remember Arnhem"
This is an older book and (currently) out of print, so finding a copy can be rather difficult (and expensive - I was lucky to get a signed second-hand copy for about £40). It is a very good book, covering the squadron's history before and after Market Garden. For wargamers, it does lack some useful information though such as TOEs. Highly recommended.
Hilton, Robert - "Freddie Gough's Specials At Arnhem"
This is a more recent publication, but is difficult to get hold other other than from specialist book stores. It's also quite expensive (about £40).
Like Fairley's book, this covers the full history of the squadron in a lot of detail. It also has plenty of useful information for wargamers in the appendices. Highly recommended.
Evans, Des (edited by Mike Gallagher) - "With Recce At Arnhem"
This is a personal account by the author rather than an authorative history of the squadron. It also suffers from exaggeration of his exploits, taking other peoples' stories as his own and making claims which are contradicted by the evidence. For instance:
1. He claims that he was a last minute addition to the Arnhem force, replacing someone from C Troop who was injured. In fact, he was always due to go as a member of HQ Troop.
2. By claiming to have been in C Troop, he is able to claim he was involved in the skirmishing after 8 Section's jeeps were ambushed on the first afternoon. As he was actually with HQ Troop, he wasn't present. He also wasn't with the detachment which recovered the dead the next day.
3. He claims to have helped Lt Bowles reach the Hospital for the Blind in Wolfheze followign the Tuesday ambush of C Troop. This is steadfastly denied by Bowles.
There are many instances where the editor (not a professional editor, just a friend who seems to be a bit of a "Paraboo") adds footnotes to try to explain why verifiable documentary evidence contradicting Evans' account is wrong. Not recommended, unless you are after a rip-roaring, Boys' Own adventure and damn the facts to Hell!
Apart from these three books, there isn't anything else published other than on the web where you can find the War Establishments (WEs = TOEs) for the squadron (very useful for wargamers), the War Diaries and some personal accounts.
Market Garden
There are many general books covering the whole of Market Garden. I'm going to recommend the two most recent works (that I know of and have read):
Beevor, Antony - "Arnhem: The Battle For The Bridges"
Buckingham, William - "Arnhem: The Complete Story of Operation Market Garden 17-25 September 1944"
Beevor's book is much the easier read, but Buckingham's goes into much greater detail; but, Gawd!, some of Buckingham's prose is turgid.
From the German perspective, Robert Kershaw's "It Never Snows In September" is highly recommended; I haven't read it yet, so can't comment.
There are far too many books on individual units, or by various senior officers to list them all - searching for "Arnhem" or "Market Garden" should provide you a long list to choose from.
Useful Websites:
The Pegasus Archivehttp://www.pegasusarchive.org/
This site is a very useful resource for all operations in which British airborne troops took part. Included for most operations are unit histories, war diaries, overviews, rolls of honour, biographies etc.
For joint operations it has very little detail for the US forces involved, mostly due to lack of ready access to the records.
ParaDatahttps://www.paradata.org.uk/
This site, run by the Imperial War Museum's "Air Assault" team at IWM Duxford, specifically focuses on British airborne forces up to the modern day. It has less detailed information than Pegasus archive, but does have more biographical information. The "search" function is a bit awful though.
Market Garden - the Digital Monument https://www.marketgarden.com/2010/UK/page1.html
An interesting site, but doesn't have detailed information about the operation. It does have a collection of veterans' memories from all sides.
War Establshments http://www.warestablishments.net/
More for the wargamers, this site has an extensive (but not complete) collection of official TOEs for various types of unit.
Tomorrow's installment in this series will cover the events of Monday 25th september 1944, including Operation Berlin.
Phew! I'm back on schedule and the posting dates will match the event dates! There is also much less in the war diaries to report. As the battle goes on, entries seem to become more amusing.
I'll also be covering the squadron's TOE in the second half of this post.
Saturday 23rd September 1944
HQ and Support Troop
0700 - "Usual hymn to the morning Sun comes down in the form of mortar fire - heavier today than anything previous."
0900 - Brigadier Hackett arrives; discusses matters with Capt Allsop in his trench.
0930 - German voices in woods opposite HQ. Heavy MG fire prevents movement in position.
1430 - several close misses from mortar fire; Capt Allsop gets minor wound from shrapnel. A Troop
Light mortar fire; Lt Galbraith's tally of sniper kills is growing.
1200 - SP gun is slowly demolishing houses on south side of street. Fall back to next road south through gardens and establish new strong point. Capt Grubb injured and taken to RAP; Lt Galbraith assumes command.
1400 - heavy fire for MGs and snipers. Enemy closing in; driven off after many small engagements. One casualty.
D Troop
0700 - heavy mortar and artillery barrage, with intense small arms fire from 0830
0900 - enemy advance takes and holds houses on north side of road.
1000 - strong attacks are supported by Mark VI tanks. Nearby 6 pounder engages them, but one tank destroys it, killing the crew.
1100 - forward position destroyed by shelling. Sgt Pyper and Tpr Smith withdraw to Troop HQ.
1500 - Attack from east beaten off. This is followed at 1600 by simultaneous attacks from east and west. Shells hit position causing 2 casualties. Withdraw at 1630 to new position 150 yards south. Troop now down to Capt Park, Lt Pascal and 13 ORs. Heavy mortar fire causes two more casualties.
1700 - ordered to retake previous HQ strong point. This is done with support of A Troop at 1730. Position is reinforced with additional trenches; Under heavy fire, Tpr Smith collects ammunition and supplies from abandoned forward position.
Squadron TOE for Arnhem
Squadron HQ
CO - Major Freddie Gough
2ic - Captain David Allsop
Adjutant - Captain JG Costeloe
Liaison Officer - Captain H Poole
Intelligence Officer - Lt Trevor McNabb
SSM - WOII A Meadows
3 Jeeps - 2 on gliders, 1 sent ahead with seaborne element
HQ Troop
OC - Captain HA Platt
MO - Captain TDV Swinscow, RAMC
QM - Lt T Collier
Catering Officer - Lt AA Lickorish
Signals Officer - Lt FW Ladds
Lt HE Pearson
Lt G Wadsworth
SQMS - S/Sgt GE Holderness
9 Jeeps - 4 on gliders, 5 sent ahead with seaborne element. All with 10cwt trailers.
In addition, Squadron HQ and HQ Troop had 45 other ranks at Arnhem including 3 from RAMC, 2 from REME, at least 1 from Army Catering Corps and (I believe) some from Royal Signals.
Mortar Section
Commanding - Sgt L McCreedie
plus 2 Corporals, 1 L/Corporal and 9 Trroopers
2 jeeps with trailers carrying 3" mortars.
Most of the jeeps listed included a single Bren gun team. Some also carried a PIAt or a 2" mortar.
Three Recce Troops, each with four sections of 2 jeeps. the HQ section jeeps had a single Bren gun team, the Section jeeps had two Bren guns each. Each section also had a sniper rifle; the rest of the men were armed with Sten guns.
A Troop
HQ Section
OC - Captain M Grubb
Sgt H Venes
plus 1 L/Corporal and 5 Troopers
1 Section
Commanding - Lt J Stevenson
L/Sgt M Riches
plus 1 L/Corporal and 7 Troopers (NB - includes the one who failed to jump)
2 Section
Commanding - Lt Dougie Galbraith
L/Sgt G Williams
plus 1 Corporal, 1 L/Corporal and 6 Troopers
3 Section
Commanding - Lt DR Guthrie
L/Sgt -RJ Hewer
plus 1 L/corporal and 7 Troopers
C Troop
HQ Section
OC - Captain JA "Butch" Hay
Sgt FC Winder
plus 6 Troopers
7 Section
Commanding - Lt RC Foulkes
L/Sgt WC Stacey
plus 1 L/Corporal and 7 Troopers
8 Section
Commanding - Lt PL Bucknall
L/Sgt T McGregor
plus 1 L/Corporal and 7 Troopers
9 Section
Commanding - Lt CB Bowles
L/Sgt D Christie
plus 2 L/Corporals and 6 Troopers
D Troop
HQ Section
OC - Captain JCR Park
Sgt J Pyper
Plus 1 Corporal, 1 L/Corporal and 5 Troopers
10 Section
Commanding - Lt J Marshall
L/Sgt E Jenkins
plus 1 L/Corporal and 8 Troopers
11 Section
Commanding - Lt WF Hodge
L/Sgt G Storrie
plus 1 L/Corporal and 7 Troopers
12 Section
Commanding - Lt AF Pascal
L/Sgt W Bentall
plus 1 L/Corporal and 7 Troopers
Tomorrow, well I think you've got the pattern down now. I might add another short bit about the squadron. Or maybe not.
Phew! Over the past two days I have managed to write and schedule the rest of the posts for the series! My time is free! My time is free!
Today I will be covering the squadron's activities of the Wednesday, Thursday and Friday.
Wednesday 20th September 1944
HQ and Support Troops
0800 - subject to first intense mortar barrage (the morning "hate" as it came to be known) and also from a pair of Nebelwerfers located somewhere to the north-east.
1200 - hot meal of stew served at HQ, the first proper hot meal they'd had since landing.
1400 - local battle going on as A and D troops return; sent out again on foot to occupy strong positions in houses in the streets north of the Hartenstein.
1530 - further intense mortar fire, supported by a multiple flak gun. This causes some casualties.
1630 - receive news that Major Gough is alive and with his party at the bridge.
1645 - Polsten gun section dispatched to support A and D Troops, but come under fire with Lt Christie being killed while trying to save jeep and Polsten.
1900 - mortar barrage ends.
A Troop
0730 - positions have been taken up in two sets of woods in north of Oosterbeek; 1 and 2 Sections in the small woods west of the railway station (near the "White House" which was the HQ position of the KOSB) and 3 Section in the larger woods south of the station. At 0800 they attempt to make contact with the KOSB, but are prevented by heavy small arms fire.
1000 - SP guns and infantry observed on road heading south from station. 1 and 2 sections engage, forcing Germans to withdraw in a sweeping arc which then engages 3 Section who are forced to withdraw to Troop HQ position.
1100 - joined by D Troop, but unable to launch counter attack due to heavy mortar bombardment
1400 - withdraw through back streets to squadron HQ, skirmishing with Germans on the way.One man wounded.
1500 - sent back out on foot to occupy strong points in houses to north. Positions established in three houses, with furniture and mattresses piled up around windows and doors. No enemy contact this day.
D Troop
0700 - move into woods south of station (same one as 3 Section of A Troop). Engage and drive off small enemy patrol.
0800 - take up positions near underpass through railway embankment to south-east of station, subject to lots of MG and sniper fire.
1030 - ordered to join A Troop, reaching them at 1100. Under intense bombardment.
1300 - engage Germans on road running along the western edge of large woods.
1400 - Troop retires to squadron HQ and become involved in local battle when they arrive around 1430.
1500 - sent out to occupy buildings to north-east of those A Troop are sent to. No further enemy contact this day.
Thursday 21st September 1944
HQ and Support Troops
0700 - morning "hate" starts. By 1000 it appears that they appear to be firing in time with music as a rhythm is clear.
1430 - supply drop comes in, most containers fall outside perimeter. At 1610 two are investigated - one contains berets, the other an assortment of rank insignia that would "gladden a quartermaster's heart".
1700 - mortar section under Sgt McCredie dispatched to assist 1st Border Regiment.
1800 - radio contact lost with D Troop. Lt Lickerish sent out to contact them.
1830 - bombardment is building to climax, with 8.8cm flak guns joining in. Mortars are now dropping phosphorous bombs. Bombardment ends at 1900.
A Troop
0700 - foot patrols out in local streets, no sign of Germans.
1000 - hear German voices and rtracked vehicles, assume an SP gun is nearby.
1100 - SP gun shells building held by Troop HQ and 2 Section. L/Sgt Williams and Trooper Mann take it out with a PIAT (the slit trench they did this from was so deep that Mann had to kneel down and Williams stand on his back!)
1200 - 1 Section's position (a bakery) is attacked, forcing evacuation. Germans occupy house.
1300 - aided by a PIAT, 1 section retake their former position, but it is later set on fire by the Germans and burns down.
1330 - Mark VI tank shells position held by HQ and 2 Section. Move out to a building on south side of street near 156 Para.
1430 - joined by 1 and 3 Sections.
D Troop
0900 HQ acting as listening and observation post for own artillery, giving directions over wireless.
1100 - enemy tanks sighted to north, driven off by artillery.
1200 - 10 Sectin attacked by infantry supported by a half-track, with Lt Marshall (he of the Sunday afternoon drive) and one OR as casualties. Section withdraws to Troop HQ.
1300 - 11 Section's position attacked and eventually overrun. Lt Hodge and some men taken prisoner; enemy withdraws.
1630 - foot patrols from 12 section go to the former 10 and 11 Section positions to gather weapons and ammunition that had been left behind.
1800 - continued skirmishing with enemy.
2200 - foot patrols make contact with A Troop and 156 Para as radio is out of action.
Friday 22nd September 1944
HQ and Support Troops
0730 - fine morning, spoiled by the morning "hate".
0945 - Sgt McCredie returns; both mortars destroyed by the morning bombardment. They have also taken 3 casualties.
1000 - mortar and artillery fire has increased.
1200 - Capt Costelloe has four ORs removed to regimental aid post, they are harassed by MG and sniper fire on the way.
1515 - Capt Allsop take PIAT ammunition and radio batteries to A and D Troops, reaching D Troop around 1540. Move on to A Troop's position in a grocery at 1610. Lt Dougie Galbraith demonstrates the system he has developed for taking out snipers - a man in one of the slit trenches outside hoists a helmeted dummy above the lip of the trench while upstairs Dougie observes the sniper's location and shoots him. Allsop returns to squadron HQ at 1650.
The mortar bombardment finally ceases when it is dark.
A Troop
0900 - Lt Wadsworth leads a successful patrol to the KOSB positions.
1610 - visited by Captain Allsop. "All day German troops present themselves in twos and threes to be shot. They were obliged."
D Troop
The Troop's positions were under heaving shell and mortar fire all morning. The position has been strengthened by barricading all windows and digging slit trenches in the surrounding gardens.
1600 - visit by Captain Allsop.
2200 - patrols maintained throughout night.
Tomorrow - Bash On Recce! Part 4
covering 23rd September and the squadron's TOE.
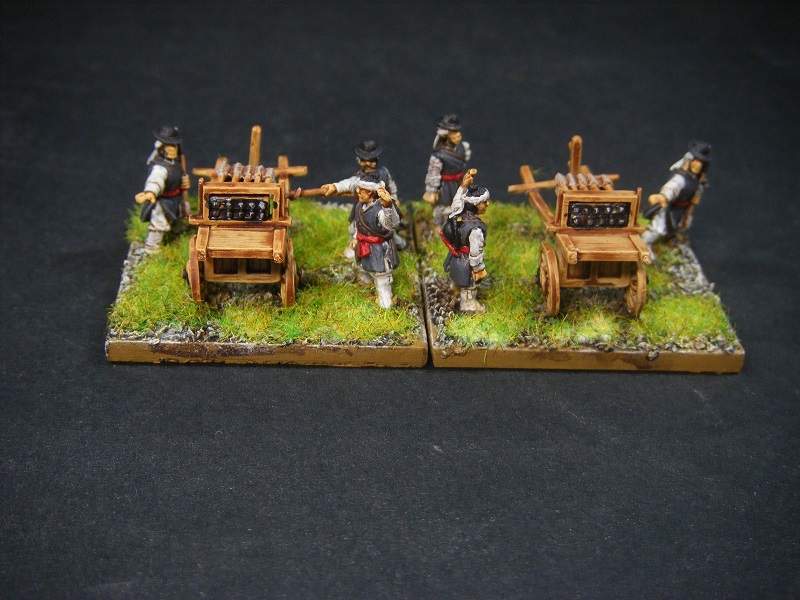
These Hwatcha add two bases of light rocket artillery to my Choson Korean army for ADLG/FOG-AM/FoGR. In total, they took less than a day to paint, varnish and base but with long gaps between some stages.
The figures are 15mm from Essex Miniatures.
Because all the "Arnhem 75th" posts have been scheduled to post at 1800 UK time, I've scheduled this one to go out at 0600 UK time on Sunday morning, when I will be happily snoozing in the land of nod.
Bleedin' 'eck, guv'nor, these posts take an age to write. If only I'd thought to do this series a few weeks ago, I could have had them all nicely written and scheduled for publication. Oh well, too late now.
Today's post will cover what the squadron, less the bridge party, got up to on Monday 18th and Tuesday 19th September 1944. With Major Gough missing (actually at Arnhem bridge), Captain Allsop had assumed command of the squadron the previous evening.
Monday 18th September 1944
At about 0700, the squadron set out on their allocated tasks for the day.
C Troop
C Troop were assigned to cover the eastern flank of one of the landing zones. Due to their losses, they had been reinforced by a detachment from HQ Troop under Lt Pearson and including Troopers Des Evans (despite his claim in "With Recce At Arnhem" to have been with C Troop all along) and Jimmy Cooke.At some point during the morning some of them posed for photos in Wolfheze.
Having adopted defensive positions, they came under sniper fire; a patrol was sent out to deal with them and around 1000 returned with four rather scared prisoners. 9 Section under L/Sgt Christie were sent out to the ambush site to recover their dead. They found Trooper Dickie Minns, who had been badly wounded and left for dead by the Germans, in a ditch a short distance from the rearmost jeep. He was still alive, but in very poor condition; after initially being treated by 181 Field Ambulance, he was taken to the dressing station at Hotel Tafelberg and eventually became a POW. It seems that they also managed to recover L/Sgt McGregor's jeep.
Of the four men who had been in the lead jeep, the driver was still in his seat and burnt beyond recognition. Initially it was assumed he was Trooper Arthur Barlow who should have been driving that jeep; Lt Bucknall had actually swapped jeeps and the driver was Trooper Ted Gorringe - Trooper Barlow had been taken POW. It took nearly 60 years before Gorringe was correctly identified and his grave marked accordingly.
During the morning and afternoon, C Troop were also subject to strafing runs by Messerschmidts, but took no casualties. They were also attacked at various times by German infantry, but beat these off - 9 Section had two other ranks wounded.
At around 1400, the supply drop came in under heavy fire from flak guns. At about 1500, the landing zone came under heavy mortar and artillery fire, supported by machine guns. This made it near impossible to get out to recover supplies.
The Troop withdrew to 1st Airlanding Brigade's HQ at 1900.
The Others
The rest of the squadron had been ordered to recce forward along the Utrechtseweg through Oosterbeek and on into Arnhem. D Troop were in the lead, followed by HQ, A Troop and Support Troop.
There is some rather nice home movie footage showing the Recce Squadron in Ooosterbeek that day; I'm not certain about the time it was taken though.
Setting off at 0700, they initially encountered no opposition until 0800 when the lead elements came under MG and small arms fire from the north. They were on the outskirts of Oosterbeek at this point, within half a mile of Mariendal and Den Brink on the western outskirts of Arnhem.
D Troop dismounted and patrolled forwards to locate the enemy positions. They found them on a side street leading up to the railway line and proceeded to "deliver some good blows causing numerous losses to the enemy. 2 O.R.'s wounded."
Around 1000, slightly further back on Utrechtseweg, A Troop sent out foot patrols following civilian reports that German patrols were working around to the squadron's rear. They observed German positions on the railway embankment; civilians reported them to be SS troops.
About 1130, HQ and A Troop withdrew to the west to a point just north of the Hartenstein Hotel (I believe that there is a typo for the grid reference in the transcription of the squadron war diary); A Troop's 3 Section jeeps reported in at this point and the Troop was ordered to push on towards Arnhem. They established themselves at a crossroads at 1200 about 1km east of the Hartenstein and sent out foot patrols to the north, having "Some spirited brushes with the Germans".
At 1200, D Troop was relieved by the 2nd South Staffords and withdrew to A Troop's location. Around 1300, enemy patrols engaged them but were driven off, the Germans leaving their dead and wounded behind. At 1400 snipers became active; these were ferreted out by individuals.
Sometime after 1430, A Troop's 2 Section jeeps arrived on the 2nd glider lift and reported in to squadron HQ. This would bring the troop up to (almost) full strength (one man had been badly injured in Sunday's drop and another had been taken ill and didn't jump). Captain Allsop decided to push HQ towards Arnhem, coming under fire when he reached the crossroads where A and D Troops were based.
D Troop, as well as foot patrols, had obviously been sending out jeep patrols to the south as they had made contact with other Divisional elements around Heveadorp and on the river road just west of Station Oosterbeek Laag.
At 1700, A Troop were relieved by the 2nd South Staffords and returned to squadron HQ, arriving at 1730. D Troop returned at 1800 and the squadron headed back to Divisional HQ which had moved to the Hartenstein.
At 2200, Lt Hodge's 11 Section of D Troop took a party of 11 Para to a point just east of Station Oosterbeek Laag, about quarter of a mile south-west of Den Brink.
At 2230, the squadron war diary records them digging in, having not had a hot meal all day.
Tuesday 19th September 1944
C Troop (with their reinforcements from HQ) were again given a separate task to the rest of the squadron.
Everyone But C Troop
The squadron's task was to patrol to the west of the Division, out towards Heelsum and Renkum.
HQ and Support Troop
0730 - initially established at the junction of Utrechtseweg and Wolfhezeweg (where Gen Kussin had been killed on Sunday). Wireless reception was good and the HQ moved slightly further west, passing through outposts of the 1st Border Regiment.
0900 - elements of Royal Army Service Corps dash through position, informing that Germans are pushing up the main road from the west. Defensive pits were quickly dug, but no enemy had appeared by 0930 so normal activity was resumed. Despite being in woodlands, wireless reception was still good.
1000 - enemy reported to be moving east from Renkum; Polsten guns sited to cover approaches from that direction. At 1100, the HQ moved back to the Wolfhezeweg junction.
1230 - Captain Allsop reports in to Divisional HQ to drive Gen Urquhart to 4th Parachute Brigade HQ. Wireless contact maintained throughout.
1415 - no wireless contact with C Troop so HQ moves north to near the Hotel Bilderburg. Still no contact, so return to junction at 1500.
1530 - remnants of 156 Para pass through position having been badly mauled. POWs brought in by A Troop.
1620 - Lt Collier reports in with bad news about C Troop.
1730 - HQ and A Troop return to Hartenstein
A Troop
0730 - Troop HQ sets up just off Utrechtseweg about 1km east of Heelsum. 2 Section sent to patrol DZ/LZ Z; 3 Section (now under Lt Wadsworth, Lt Guthrie having been injured at the RV on Sunday when his Sten accidentally fired, hitting him in his hand) were to patrol south down Schaaps Drift; 1 Section were to patrol Utrechtseweg west towards Heelsum.
0900 - 2 Section encounter a German tank supported by infantry. It was reported as a Panzer IV, but as none would have been in that area was more likely a Char B1 Bis, possibly a Flammenpanzer conversion (Panzer Kompanie C (ND) 224 had a mix of ordinary and flamethrower tanks). The section took one casualty.
1445 - 1 Section ambush a small bicycle patrol that wandered into their position, killing one, wounding two and taking the fourth man prisoner. The prisoners were escorted back to Troop HQ.
1700 - ordered to return to squadron. at 1800 take up positions to observe railway line. At 1930 they withdrew to squadron HQ, taking 3 casualties in an encounter on the way.
D Troop
D Troop were assigned to patrol the roads (Breedeweg and Italiaanscheweg) leading south through Doorwerth Woods to Doorwerth.
1000 - sighted by did not engage enemy in Doorwerth Woods.
1300 - encountered and hit Germans hard a short distance north-west of Doorweerth, forcing them to withdraw.
1400 - patrol encounters and drives off more Germans after a sharp battle.
1530 - troop withdraw to a location central in Doorwerth Woods, coming under a strong enemy attack at 1600. Ordered to withdraw to 1st Border's positions at 1630 and retire to Divisional HQ at 1700.
1730 - sent to recce the railway embankment running south-east from Halte Ooosterbeek Hoog for 1st Airlanding Brigade, supported by a 6 pounder. At 1800 they engaged German troops near the end of the embankment, slightly west of Mariendal, inflicting some casualties and taking one of their own.
2200 - a standing watch was established from houses alongside the railway line, before returning to Divisional HQ at 2345.
Poor Bloody C Troop
C Troop had a grand start to the day - hot tea and porridge for breakfast, before heading out on their assigned recce task for the day at 0630. They were to recce the area around Reijers Camp (LZ Y) and along the Amsterdamseweg to report any German Arnhem movements east towards Arnhem.
0900 - near Reijesheide come under heavy mortar fire, which destroys one jeep. Captain Hay withdraws Troop to Wolfheze.
1015 - troop moves across country and through woods to take up observation positions near Planken Wambuis on Amsterdamseweg.
1500 - as supply drop comes over, notice that Germans have cut their way south through the woods. Following a foot patrol to see if their is a way through, a conference of the senior staff at 1530 was called and the decision taken to break out at full speed along the main road towards Arnhem.
1545 - with jeeps in tight formation, the Troop breaks out of the woods and onto the road., hitting 60mph. They pass some British paras in a small clearing alongside the road who wave at them. Entering a stretch where the road is wooded on both sides, they are ambushed by Germans - the paras in the clearing had been trying to warn them of the danger. The lead jeeps take evasive action and all avilable guns are firing - Vickers K guns, Brens, Stens, rifles.
The first jeep carrying Captain "Butch" Hay, Lt Pearson (HQ Troop), Trooper Jim Salmon and Trooper Des Evans (HQ Troop) came under fire from a second group further along and Lt Pearson (driving) was hit and killed, causing the jeep to veer off the road.
The second jeep carrying Sergeant Winder and Troopers Giles, Tickle and Cross managed to avoid being hit and passed beyond the ambush location, with Trooper Giles doing a fantastic job of driving to avoid the first jeep and also a felled tree which was across the road.
The third jeep, driven by Lt Bowles wasn't so lucky. the jeep's engine was hit by MG fire and started to slow down. Bowles turned the jeep into the ditch alongside the road and the men dismounted and took cover where they could. Trooper Brawn and L/Corporal Baker were dead, Trooper Fergus was assumed to be dead but was only unconscious.
The fourth jeep with L/Sgt Christie, L/Corporal Palmer and Troopers McSkimmings, McCarthy and Cooke (HQ Troop) also made it through the ambush, but McSkimmings had been killed.
The last two jeeps, those of Lt Foulkes' 7 Section, were able to avoid entering the ambush by driving off the road into the woods to the south. Lt Foulkes' group dismounted and disappeared on foot; the sixth jeep also turned south off the road into the woods but came under fire, the men in it being surrounded and taken prisoner not long after.
The two jeeps which had made it through the ambush raced on along Amsterdamseweg and took the sharp right turn onto Wolfhezeweg at speed. Trooper McSkimmings' body fell off the back of his jeep. They reported in to the squadron's base position near the Hartenstein shortly after 1600.
Trooper Tickle, batman to Captain Hay, was badly shaken and seems to have wandered off, not to be seen again. He was killed on either the 25th or 26th. The other survivors stayed with squadron HQ for the remainder of the battle.
the group with Lt Foulkes spent a couple of days trying to make their way back through the woods and picked up some stragglers from 4 Para Brigade before being surrounded and taken prisoner.
Lt Bowles and Trooper Evans had both been wounded. Bowles somehow made it to the hospital for the blind in Wolfheze, where he was treated and later taken prisoner. Trooper Evans claims in "With Recce at Arnhem" that he assisted Bowles to get there and was taken prisoner along with him. Bowles' account differs and says that Evans wasn't there.
Tomorrow's Installment: Bash On Recce! Part 3
Featuring the exploits of the Recce Men 20-22 September
In amongst all of my recent Arnhem reading, I came across the first example I have noticed (I may have read it before, but forgotten) about there being a small number of black and mixed-race soldiers with 1st Airborne Division at Arnhem. The individual mentioned was Trooper Charles Cecil Bolton of 12 section, D Troop, 1st Airborne Reconnaissance Squadron. This intrigued me, so I decided to hit Google and see if I could find out anything about the others.
There wasn't much. I found one thread on WW2 Talk which did give the names of four others. Two of those names I have been able to confirm. For the other two, however, it seems that the contributor might have got their names the wrong way round, which led me on a frustrating search until I discovered the name reversal. It also seems that they probably weren't black or mixed-race.
I believe that he had latched onto them having the nickname "Darkie" and assumed that they were black. The nickname "Darkie" was also given to many white soldiers - 21st independent Parachute Company had a Gordon "Darkie" Finglas and 10 Para had Harry "Darkie" Houghton, both of whom were white. It was also true that not all black soldiers were nicknamed "Darkie", an example being Roland "Nocker" West (see below).
Whilst there was undoubtedly some racism in the British armed forces during WW2, there is no evidence that it was present in the units where these men served; they all appear to have been held in high respect by their comrades and superiors.
Trooper Charles Cecil "Darkie" Bolton
Trooper Bolton was a Liverpudlian of Trinidadian descent. He served with 1st Recce in North Africa, Italy and at Arnhem. He was known to the other ranks as "Darkie", to the officers as "Massa".
Whilst in North Africa, his troop took part in a joint exercise with US forces and were to eat at the US base afterwards. On entering the mess, the US cook sergeant pointed at him and said "He eats on the other side". This upset his comrades who remonstrated quite aggressively with the cook to no effect. Captain Grubb, the troop commander, intervened and told the cook that either Bolton ate with them or they wouldn't eat there. When the cook wouldn't allow that, the Troop departed, telling the Yanks where they could stick their food.
After the Italian campaign, when the Squadron returned to England, Trooper Bolton undertook parachute training, gaining his wings. He was part of the Squadron's parachute contingent for Market Garden.
There was one incident earlier in 1944 which is worth mentioning. Bolton was in a work party under Lt Dougie Galbraith comprising members of A and D Troops helping to set up a new military camp near Cirencester. His 21st birthday was coming up and he asked the officer for leave to go to London as his mum was throwing a party for him. Lt Galbraith refused*; however his routine was to turn up late in the morning to supervise the work and to disappear shortly after lunch. Bolton wasn't to be deterred and asked his mates to cover for him, then set off for London that afternoon. The next day his mates did cover for him, leading Lt Galbraith on a ghost-chase around the camp. Bolton returned very early the following morning with a birthday cake, having had a great time in London with his family and friends. While the work party was having a late morning tea break, Lt Galbraith approached Bolton and apologised for not being able to give him leave; Bolton replied "That's OK sir - would you like a slice of my mum's birthday cake?".
* The reason for refusing the leave was that the MPs were out in force in the major towns and cities rounding up deserters. Bolton apparently had several near misses, but avoided the MPs.
When Major Gough was summoned by General Urquhart on the first day of Market Garden, Bolton and Trooper Bert Welham (also from 12 Section, D Troop) were taken along as additional protection (Bolton was a Bren gunner). After failing to find Urquhart, Gough decided to join the 1st Para Brigade HQ elements and head to the Arnhem road bridge, making the two recce jeep parties the only members of the Squadron to reach their original target. Bolton made a big impression on the bridge defenders as he was a crack shot with the Bren and responsible for a large number of German casualties - Gough recalls him saying after one kill "Dere goes 'nother one of dose bastards". Others recall him flipping a V sign at Germans before dropping them. He was among the bridge defenders taken prisoner on Wednesday 20th September. He was recommended by Gough for the Military Medal, but instead was awarded the Dutch Bronze Cross.
At the end of the war he returned to 1st Recce and when it was being disbanded transferred to 21 Independent Parachute Company (the Pathfinders) and served with them in Palestine.
Private Kenneth "Darkie" Roberts
Roberts was with 1 Platoon of 21st Independent Parachute Company (the Pathfinders), so would have been one of the very first paras to hit the ground on 17th September. He was from Stoke-on-Trent; his father was from Sierra Leone and settled in England after serving with the army in WW1.
Interestingly, like Trooper Bolton, Roberts was a Bren gunner. He was a middleweight boxing champion and noted for his sporting prowess.
On the night of Monday 25th/Tuesday 26th September, he was part of the evacuation across the Rhine. there are a number of different versions of what happened to him that night.
One story suggests that he made it across the river in one of the boats, but discovered that a wounded mate had been left behind so got back in another boat, crossed to the north of the river, found his friend and got him in a boat but was then mortally wounded on the crossing back south. This story seems to be a myth as it is contradicted by the accounts of other members of other Pathfinders, all of which say that he chose to swim across the river, but the details differ.
In one account, it is suggested that he attempted the swim before the first assault boats arrived. That is unlikely as the Pathfinders would have arrived at the north bank after the first boats made their crossing
The other accounts all suggest that the swim was around the time of (or just after) the last boats arrived on the north bank, as it was beginning to get light. The accounts differ somewhat at this point, but they all note that he was a strong swimmer.
One account suggests that he got taken away by the strong current (the river was somewhat in flood after heavy rainfall) and drowned. Two accounts suggest that he drowned after being hit by German machine gun fire. The final account I've found seems the most likely - he made it across to the south bank of the river, but was hit by machine gun fire as he made his way up the beach.
He is recorded as having been taken to the temporary hospital which had been set up in the Jonkerbosch Boarding School near Nijmegen, where he died of his wounds. That accords with him having made it across the river. The roll of honour has his date of death listed as 29/09/1944 and his grave is at the Jonkerbos War Cemetery. He was 23 years old.
Corporal Roland James "Nocker" West
West was born and raised in India to black parents. He enlisted in the Gloucestershire Regiment and volunteered for airborne forces. It is likely that his parachute training was done in India
West served with 5 Platoon, A Company, 156th Parachute Regiment and was KIA on 20th September, aged 22. He has no known grave, but is listed on the Groesbeek memorial.
The two below are the ones where the forum contributor got the names the wrong way round.
Private David "Darkie" Williams?
Williams served in the MG Platoon, Support Company of the 10th Parachute Battalion. I have found a reference to him being wounded during the landings on Ginkel Heath on Monday 18th September, but no details of how badly. He became a POW either when casualties were evacuated from the pocket during the brief truce on Monday 25th or the following day after the remnants of the division had been evacuated over the Rhine.
I have seen a photo of Williams - he wasn't black; could possibly have been mixed-race but was most probably white.
"Darky" Reynolds?
The only information I have for Reynolds is his surname and that he may have been KIA at Arnhem.
I can only find one "Reynolds" on the roll of honour - Corporal Alfred Reynolds of 1 Para who was KIA on the 18th or 19th. I've only found one photo of him - he could possibly be mixed-race, but most probably was white.
For other Reynolds who weren't KIA, I have found a reference to a "Darkie" Reynolds in 2 Para (I haven't found a photo of him or any more info) and a photo of someone (who *might* be mixed-race, but most probably white) in Stalag XVIIIA.
Edit: I've just come across the Johnny Frost episode of "This Is Your Life" on YouTube - Sergeant Alfred "Darkie" Reynolds of 2 Para was definitely white.
There is also a reference to a black "para" taken POW at Arnhem who helped other POWs escape but refused to do so himself as being black and well over 6 foot tall he would be easily recognised as an escaped POW. That could be Trooper Bolton as he was very tall.
There may have been other black soldiers at Arnhem, but these are the only ones I have (so far) found any information about.
Why have I written this post? Mostly because it intrigued me that their presence and contribution in the battle isn't generally noted in the many books about the battle. Also because it means that you can add some variety to the flesh tones of your British Airborne units - if anyone complains about you being a "PC SJW Liberal Idiot" you can simply tell them to read about these people for themselves; just don't paint too many (maybe 1 per platoon/company/battalion depending on what level your rules are aimed at) as that is just five names from a Division of over 10,000 men!
Over the past few days, since finishing the Warlord Games paras, I have got a fair bit done besides writing posts for my "Arnhem 75th" series.
On Wednesday I got the airbrush out and primed a few bits and bobs - the 15mm SYW figures bought at Colours; the Foundry para command also purchased at Colours; some Too Fat Lardies jump off points and some bases that I'd "gunked" on Tuesday. I also made a start on painting some left over 15mm SYW musketeers as dismounted dragoons. I finished painting them and varnished them yesterday, but won't be basing them yet - I need to buy a few more figures (probably four mounted dragoons) to give me two units.
Yesterday evening I painted the 15mm Korean rocket artillery. After this photo was taken, I gave them a coat of Klear/ink; when that is dry I will get them glued onto bases, add the basing texture, paint that and then varnish and flock them.
Lieutenant John Marshall and Trooper Joe Irala of 10 Section, D Troop
Major Freddie Gough and his merry band of men.
The (Mis)Adventures of Lt Marshall (or "How A Reconnaissance Officer Got Lost In The Space Of A Quarter Of A Mile Whilst Following Other Jeeps Of His Troop").
I suspect that anyone reading this blog will be aware of the old military maxim that there's only one thing more dangerous than an officer with a map - an officer with a map and a compass.
On Sunday 17 September 1944, Lt Marshall and his driver Trooper Joe Irala set out with the rest of D Troop from the landing zone to the RV with the squadron's parachute element. The distance between the two locations was approximately a quarter of a mile. They must have been the last jeep in the group as nobody noticed when they somehow took a wrong turn at the corner of a wooded area halfway between their start point and the RV. It's an easy mistake to make, going South instead of North...
Having lost touch with the other jeeps they continued on their way and eventually reached Renkum, a village to the south of the drop zone. They then turned east, heading through heelsum where they picked up the Utrechtseweg and on towards Oosterbeek, passing the crossroads where 3 Para had shot up the staff car of General Kussin (the commander of the Arnhem garrison) at the junction with Wolfhezeweg. At some point not far after this, they must have headed slightly south again as they were witness to the railway bridge being blown up (some of C Company, 2 Para were on the bridge when it blew).
At some point during their jaunt, they managed to evade an encounter with a German armoured car, eventually returning to Divisional HQ, later to be reunited with the rest of the squadron.
This event isn't mentioned in the Troop or Squadron war diaries, presumably to spare the Lieutenant from official embarrassment, but it is recounted in Fairley's "Remember Arnhem" and Hilton's "Freddie Gough's Specials".
Recalled to Divisional HQ (or "How Freddie Gough Tried And Failed To Find General Urquhart, Lost a Trooper On The Way And Found Himself At Arnhem Bridge")
Also on Sunday 17 September 1944...
At around 1630, whilst C Troop's firefight was still going on, Major Gough received an order to report to General Urquhart at Divisional HQ. Having discussed arrangements with his 2ic, Captain Allsop, he gathered an escort party and set off at around 1645.
The party was as follows:
Jeep 1 - Major Gough (CO, SHQ, driving*), Trooper WC Bailey (HQ Troop, gunner**), Trooper D Simpson (HQ Troop), Trooper S Jones (HQ Troop)
Jeep 2 - Captain HA Platt (OC HQ Troop), Lieutenant TVP McNabb (Intelligence Officer, driver), Corporal G Dixon (HQ Section, D Troop), Trooper R Brooker (HQ Section, D Troop), Trooper R Coldicott (HQ Troop, gunner), Trooper J Woods (HQ Troop, radio operator)
Motorcycle - Trooper A "Chalky" White (HQ Troop, Don R***)
At some point there was a shifting of personnel between jeeps as Trooper Brooker was driving Major Gough's jeep later on.
* Apparently this was always a hair-raising experience for his passengers
** Bren gunner
*** "Don R" was British army slang for a dispatch rider
As the Germans were rather active in the area, he decided to borrow a Bren gun team to provide additional protection. The two men he grabbed were Trooper C "Darkie" Bolton (12 Section, D Troop, gunner) and Trooper B Welham. They would have been on Major Gough's jeep.
On arrival at Divisional HQ, Major Gough discovered that General Urquhart had gone off to find Brigadier Lathbury at 1st Parachute Brigade HQ which was following 2 Para. As the General hadn't left any instructions with his staff, Major Gough decided to follow on and try to find him.
Leaving Divisional HQ, the party headed south towards Heelsum, then down to the river road being taken by 2 Para. Around Doorwerth they came under fire. Major Gough took evasive action which resulted in Trooper Coldicott falling off the jeep and being left behind - he made his way back on foot to Divisional HQ.
On reaching the rear of 2 Para's column around 1800, Major Gough found elements of 1st Parachute Brigade HQ. He had missed General Urquhart by a matter of minutes - he had headed up to find Brigadier Lathbury who was with 3 Para on the middle route along Utrechtseweg. However, this time he had left a message for Major Gough - "Tell your jeeps to follow 2 Para's route". Given the time, not knowing where the squadron was and not being in radio contact with them, Major Gough chose to follow 2 Para along the river road with the Brigade HQ and attached elements (engineers, anti tank battery, signals and service corps troops), trusting that the rest of the squadron would either receive those orders directly or would have broken through the ambush.
The party eventually arrived in the bridge perimeter and were assigned locations to defend. "Chalky" White, the Don R, set off back to Divisional HQ on his motorcycle (he made it past the German blocking lines).
So, twelve men of the squadron did make it to the bridge and eleven men stayed to fight there. Major Gough found himself in command of the defenders after Johnny Frost was injured on the Wednesday morning, referring any major decisions to Frost, then in sole command of the small remaining contingent after the wounded (including Frost) were evacuated as POWs, eventually being captured on the Thursday morning.
Tomorrow's Installment - "Black Soldiers at Arnhem"