About Me

My photo
London, United Kingdom, United Kingdom
A mythical beast - a female wargamer! I got back into wargaming in the summer of 2011 after a very, very long break and haven't looked back since. I must admit that I seem to be more of a painter/collector than a gamer, but do hope to correct that at some point in the near future. My gaming interests span the ages, from the "Biblical" era all the way through to the far future. I enjoy games of all sizes, from a handful of figures up to major battles (see my megalomaniacally sized Choson Korean and Russian Seven Years War armies).

Saturday 30 April 2022

Paint Table Saturday 30 April 2022


Although the paints I'd ordered arrived yesterday, I decided to spend today priming some of the new stuff. I still need to do a zenithal prime on the interior walls, but ran out of time today so that will have to wait until tomorrow. I've got a few more bits to prime after that's done, and then I can finish off the street tiles.


If all goes well, I should have all the airbrushing steps finished by Monday evening. Unless there are any hitches, I should get all of the detailing done by Thursday.

Thursday 28 April 2022

Wednesday Workbench 27 April 2022


I was making good progress on the tiles, but then I ran out of one of the paints on Monday. I've ordered some more, but work has temporarily stopped on that project.

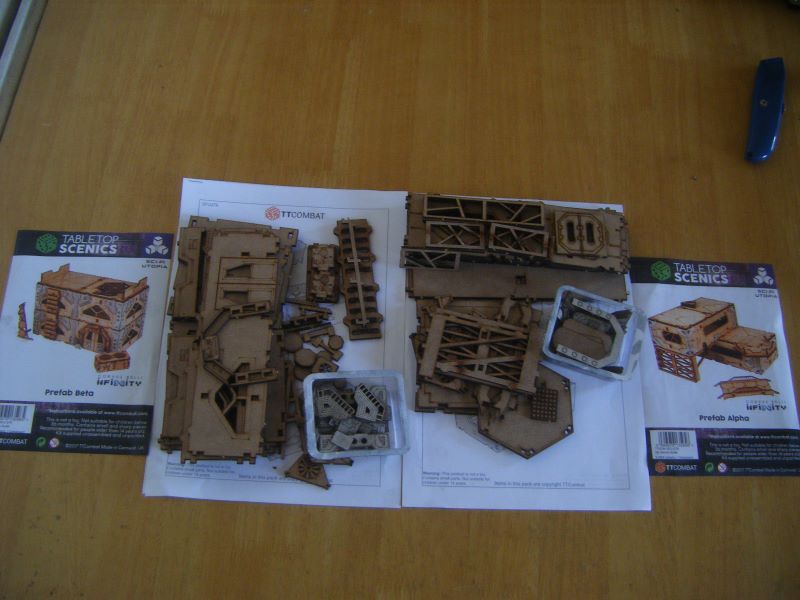
Luckily, that afternoon I received some MDF goodies from TT Combat:


Six of those are new orders. The other two are replacements for the two that I'd had problems with - they very generously sent me full kits rather than just the sprues.

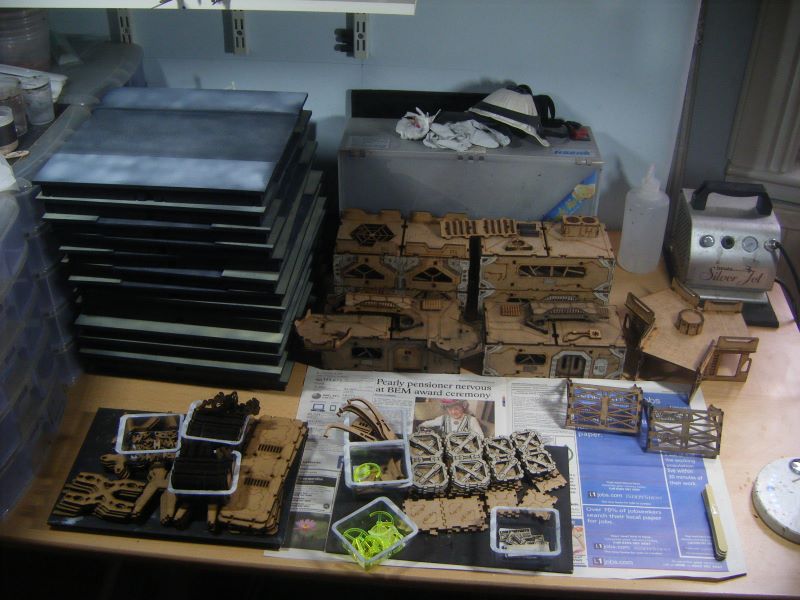
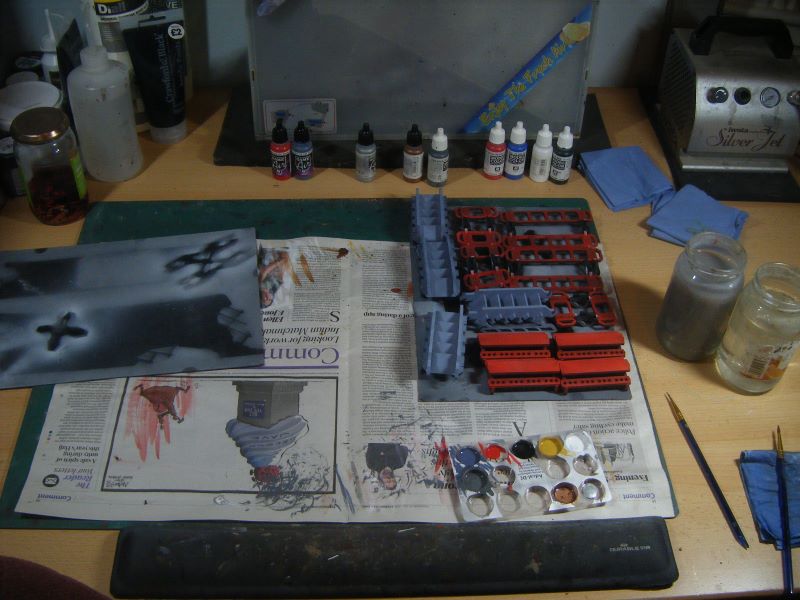
To make use of the down-time on the tiles project, I decided to de-sprue the kits and start assembling them. Here is everything that has been assembled so far (including the ones I'd assembled a week or two ago):


PreFeb Beta


PreFab Alpha


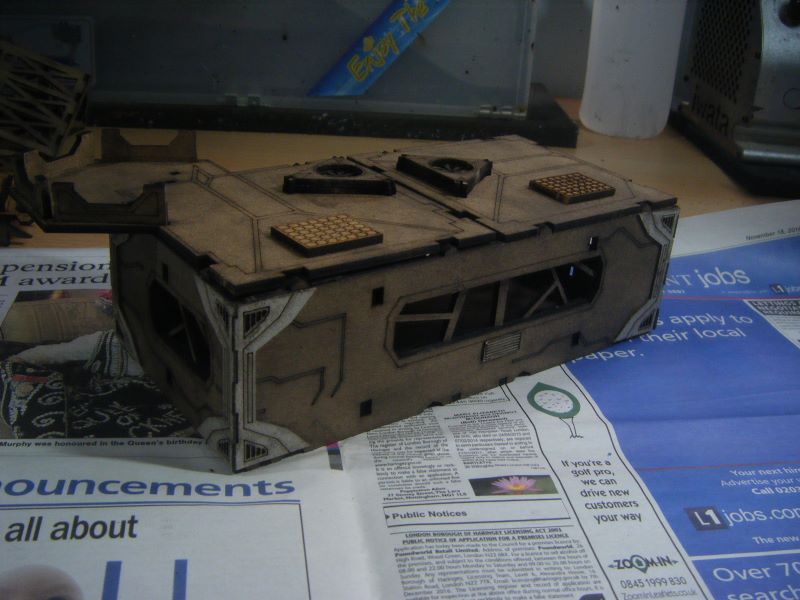
Having been sent a complete kit, I was able to assemble a standard ground floor piece:


...and also a two-door ground floor piece (using some doors from Blotz):


Cantilevers, bridges and connectors:


Tri-Walkway


I bought this one to see whether it would work with the PreFab units. The "roof" is the same height and width, so it should work with them for layouts. They also do Tri-Building kits - I might get some of those (and more Tri-Walkways) at some point.

I've de-sprued the other kits as well, but won't assemble them until the buildings have been painted:


Large Crates and Streetlights


I only de-sprued enough parts to make up five streetlights as I only have nine acrylic "lamps", four of which I need to the original kits.
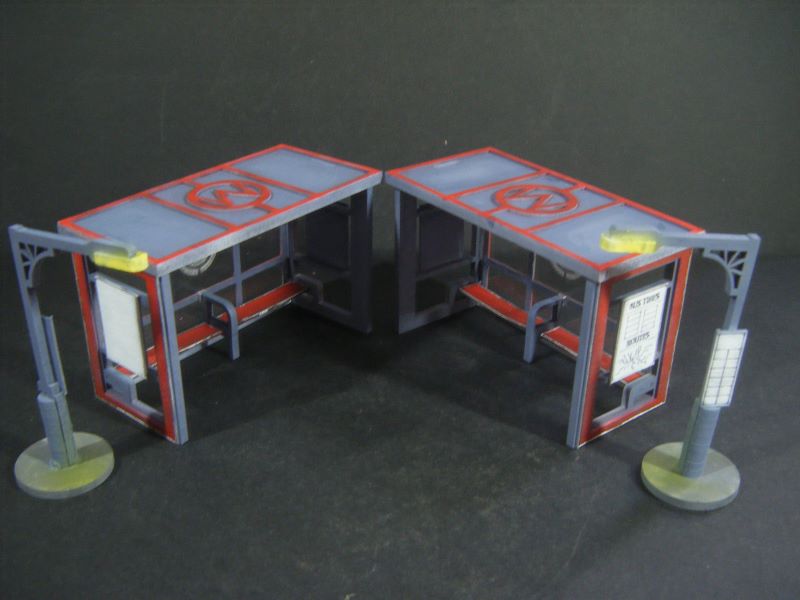
Walkways


There are three kits' worth of parts in the photo above!

The parts which haven't been assembled yet have also not had the "tags" sanded. I should be doing that tomorrow (hence the bundle of emery board nail files in the top photo).

Saturday 23 April 2022

Paint Table Saturday 23 April 2022


I went ahead and applied a mix of grout and paint to the road portions of seven tiles, then watered the mix down and applied it to the pavement and kerbs on all thirteen tiles.


The texture was about right for the pavement and kerb stones, but was a bit too fine for the tarmac. So today I acted on a suggestion in the comments on Wednesday's post (thanks, Herkybird!) and made up a mix of grout, paint, sand and a little water, then applied that to the tarmac areas:


To avoid obvious brush strokes, after applying it I then went over it with a stippling motion using a slightly damp brush. In the photo above, the tiles are still drying. Tomorrow I'll sand down the edges and any patches which are too rough.

Wednesday 20 April 2022

Wednesday Workbench 20 April 2022


I haven't done much since assembling what I could of the SciFi buildings. While I wait for TT combat to send out replacement bits (they replied to my email today), I thought I'd do a quick test of something I had planned for adding tarmac texture to some street boards (these ones from Multiverse).

As you can see from the photo above, I'm considering using pre-mixed tile grout. One one side of the base I applied it neat, then painted and drybrushed it. On the reverse I applied a mix of grout and black paint, then drybrushed it.

Neat, painted, drybrushed

Grout/paint mix, drybrushed

I think that mixing the grout with black paint gives the better finish It is also much easier to apply. Tomorrow, I will mix up a batch of grout and paint and then add it to the road surfaces.


Sunday 17 April 2022

Paint Table Saturday 16 April 2022


There's nothing on my paint table right now as I decided that next up would be the two extra pre-fab buildings I'd ordered. I spent a couple of hours this afternoon popping all the bits off the sprues. Tomorrow I will sand down the tags and start assembling them. 

However, there is a snag with one of them. It appears that TT Combat have made a mistake with their sprues as instead of three long window walls and one long door wall, the kit came with two of each. I've sent them an email, so hopefully they will sort it out.


Friday 15 April 2022

Finished: SciFi Terrain


And they're finished! I even got the final airbrushing step done yesterday. Luckily, once split down they only take up three A4 boards rather than the three A3 boards they are filling in the photo above.


Walkways


I think I need to get another three packs of these for what I want. My plan is to do one of them like this and to reverse the heights of the small and large platforms for the other two. The small red bits are connectors to join platforms together.

The annoying thing with these is that there aren't quite enough of the railings.


Streetlamps


there was an annoyance with this kit as well. The MDF sprue has enough parts to make up ten lamp posts, but the acrylic sprue only has nine "lamps".  There are two packs shown here. You may have counted sixteen of these with lamps, rather than eighteen. That's because the acrylic sprue that came with one pack appears to have had something wrong with the cutting template leading to two of them being unusable - I'll be emailing TT Combat about that.

I attempted a bit of object source lighting on these. I should perhaps have airbrushed a paler shade of the base colour first on the areas that would be hit by the OSL effect.


Bus Stops


Security Gates


Fast Food Stalls


Fences


There was a further annoyance with these kits (two packs again). There was clearly enough space on the sprues to make up enough connector pieces for each join as I had eight spare uprights - they could have easily replaced two of those with the cap pieces (two would fit in the space of each upright).


All the kits here are from TT Combat. I'm quite pleased with how they turned out. 


Wednesday 13 April 2022

Wednesday Workbench 13 April 2022


It's taken me a couple of days, but I've got all the airbrushing steps done on the terrain. That just leaves all the hand detailing to do. I've already made a start on that, and two of the above boards have been done. The next board is on my paint table right now:


If all goes well, I might even finish the hand detailing tomorrow, leaving just a little bit of airbrushing to do on Friday.


Saturday 9 April 2022

Paint Table Saturday 09 April 2022


Well, that's all the assembled terrain primed. It took me a little bit longer than expected and I'll need to order some more primer before I do the prefab buildings. I'll make a start on airbrushing the base colours tomorrow.

Looking at the walkways, I think I might order a couple more sets...


Thursday 7 April 2022

Tamsin's Test Lab: Army Painter Speedpaints Test #4

 As promised yesterday, here are the results of my repeat test on medium mixing and reactivation.

Testing For Reactivation by Water

Mixes L to R: Water; Vallejo Glaze Medium; Vallejo Matt Varnish; Vallejo Thinning Medium; Matt Medium; Golden Matt Varnish (all mixes 1:1 medium to paint).


In all cases, mixing something in diluted the pigment and increased the tendency to run and pool at the hem, by varying degrees. The two which ran and pooled the least were Vallejo thinning medium and Golden matt varnish.


Testing for reactivation by water also showed variable results. There was no visible reactivation (tested by wiping the brush on white paper) with the Vallejo matt varnish and Golden matt varnish; very little with the Vallejo thinning medium and the matt medium; some with the Vallejo glaze medium and the most with the water.

That being said, very little paint was removed from any of the figures.


Testing For Reactivation By White Paint

I tested for reactivation by painting increasing numbers of coats on each quarter on the backs of the figures without any "smooshing".

L to R: as before

Anticlockwise from top right: 1 coat, 2 coats, 3 coats, 4 coats


Reactivation was seen with all of the mixes (tested the same way as for the water reactivation), some more than others as with water. The glaze medium figure looks cleaner, but I believe that was because it had the most pigment dilution and ran and pooled more. The two with the least pigment dilution and runniness also appeared to reactivate the least.

The fact that there was reactivation in all cases with paint, even those which saw no reactivation with water, suggests that there is something in the paint itself that promotes the reactivation. As the paint dries slower than the water, that probably explains it. It might be worth testing with thinned paint, which should dry quicker, but that will have to wait a while as I plan to take a break from doing these tests.