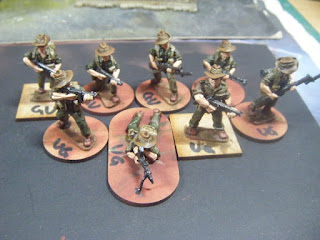
But I have, nevertheless, been quite productive.
Tuft Experiments
I've had a chance to play with the static grass "Pro Applicator" from War World Scenics. Let's say I'm not too impressed with it. It's OK for short static grass (but less convenient than the Flock Box that I have been using), but with longer (6mm and above) static grass there are some issues.
The first is the distance between the two electrodes is too long (the device one is right at the handle end of the grass cup) which makes it more difficult to generate a charge field down which the static grass can flow. It also makes it difficult to get the longer static grass fibres to stand up.
The second is that it runs off a 9V battery which doesn't create a very strong field for the longer grasses. However, this combined with the distance between electrodes does mean that you would have to be very unlucky to get a static shock while using it.
The third is that you do have to shake the applicator a lot, which makes it a bit tiring for your arm, especially if you have to do multiple passes to get any coverage.
The fourth (linked heavily to the first) is that the longer fibres have a tendency to clump into balls.
Anyway, here are some pics of the tufts I produced with it using the 10mm static grass:
 |
| Top - "Summer"; middle - "Hay field"; bottom - "Patchy" |
i) 10mm first, then filling with my shorter "sweepings"
ii) shorter "sweepings first, then 10mm mixes
iii) 10mm mixes only onto slightly thinned carpet tackifier
All of them needed 4-5 passes with the 10mm static grass.
 |
| Summer + sweepings |
 |
| Hay Field + Sweepings |
 |
| Hay Field only |
 |
| One tuft of each type |
I might try some experiments with the Flock Box this weekend, but using the plate on the box instead of the sieve. I might also buy another sieve and see if enlarging the mesh holes helps for longer fibres.
There is another method for achieving long grass tufts that I'll try - making 6mm tufts then brushing PVA over the tips and reapplying the static grass.
More Aussie Shinies!
I decided to order a few more Eureka figures - some helmeted figures with rifles and Owen guns to allow a full range of weapons to cover 42-45. Also to provide engineer teams.
I got them through Fighting 15s who are the UK agents/stockists and the service was very quick (ordered Monday, received Wednesday). I prepped them yesterday during my lunch break at work, washed them in the evening, left them to dry overnight and glued 11 of them onto bases this evening.
I'll be priming them tomorrow.
Two of the Owen guns had weak points where the end of the barrel joins the forward hand grip - one I was able to reinforce with superglue (and it seems to be OK), but the other broke off during prep. I'm going to try drilling into the gun, inserting some 0.5mm piano wire and then sculpting the end of the barrel with green stuff this weekend.
On The Workbench
Besides the ongoing tuft experiments and priming the new Aussies, I've got a couple of other small projects on the workbench.
On the grey board you can see some twigs which I picked up this evening on the way home from work. I'll be baking them in my oven tomorrow to dry them out and kill off any nasties. They'll be used on terrain and bases.
On the black board there are some bits I've started working on for Chain of Command. These will be for "patrol markers" and "jump off points". I added some Vallejo Dark Earth to four 30mm bases last night as the start of making some jump off points (you can also see some bits in front which will be used on them).
For the patrol markers, I have primed some 50mm bases - they'll be airbrushed a suitable green colour tomorrow. I also printed out some Australian flags to stick onto each side once they are painted. At which point I had the thought that I could do the same for some quick and easy jump off points, so I printed off a batch of smaller flags. If I'd thought of that before, I could have primed some 30mm bases as well today - those will have to be done tomorrow.


