"Hah! She went to the shops - I'll bet she bought a metric tonne of cars!"
Hah! You'd be wrong. I didn't buy any cars today! Okay, I'll admit - I did look, but there weren't any of the ones I was after, so that's why I didn't buy any.
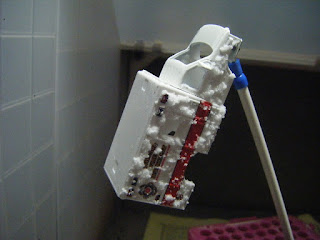
Anyhoos, once I got back I set to work on the trial vehicle. The left side got two light coats of hairspray, leaving it to dry for ten minutes or so after each. Then the right side was subjected to the salt. First, a little water was applied by brush to areas of the surface to be chipped; salt was then shaken over the water; after a few seconds the excess salt was removed by gently tapping the vehicle. I then left the vehicle for 2 hours to give the remaining salt time to set into a crust.
I probably used too much water and at this scale I should have used just table salt rather than mixing it with a little rock salt.
After a couple of hours, I airbrushed both sides with black paint (to show up the contrast when I do the chipping):
I'm not sure what happened on the left side - I'm guessing some sort of reaction between the hairspray and the paint.
I then let it sit for a while before doing the chipping. This involves adding a little water to the areas you want to treat, then "chipping" or rubbing the paint with a stiff-bristled brush. I started on the salt side, then did the hairspray side. Here are the results:
Conclusions:
1. Both techniques work well
2. For the salt method, I need to use less water, table salt only and be very selective about where I place it
3. The hairspray method is much quicker, less messy and allows better control of the chipping.
Given my conclusions, I decided to go with the hairspray method for the road-sweeper. I gave it two light coats, then left it to dry for a couple of hours. I then started airbrushing panels and stuff in different colours. I didn't get them all done as my airbrush seemed to be getting clogged. I'm not too surprised as it has been a while since I gave it a thorough cleaning.
So, I've spent the last hour or so stripping it, cleaning it (cotton buds, nylon brushes and two 8-minute blasts in the hydro-sonic bath), lubricating the parts and reassembling it. It works really well now. I've just started work on the other airbrush as it is probably just as bad.
Test Cars
I sprayed them with their second transparent colours this morning - Sunrise Yellow and Turquoise. The colour gradients don't show up very well in the photos, but look quite good in non-digital form. Admittedly, the "yellow" would have looked better with an orange second layer.
I think with the Createx paints that I'd be best off using the Revolution rather than the Neo - the larger needle size should help ensure a better flow and avoid some of the "splats" that you see on the blue.
I suppose I really should order some vinyl flame masks so that I can finish the test properly. And the transparent orange and opaque red Createx paints. Maybe some other Createx paints as well - I quite fancy seeing how the iridescent ones come out.


Fascinating, I've been thinking about tinkering around with chipping myself so seeing this has been a real help.
ReplyDeleteLove the chipping tests.
ReplyDeleteThat has to be the best, most concise Explanation of the hairspray method going. I´ve read a couple and they were (for me) too in-depth with Long winded technical explanations which sent me to sleep and I came away no less the wiser. I haven´t read any on using salt, as I wrote previous, I´ve never heard of it, but you´ve expained that clearly as well. I suppose the Advantage of the salt method could be that you can put Little bits where you want the rust..with the hairspray method you have to cover the whole model...which means there´s a Chance of the layer of "un-chipped" paint (the Areas you don´t want to chip) eventually, with time, Peeling off?
ReplyDelete@ Michael - glad to be of service :)
ReplyDelete@ Robert - it was fun doing them :)
@ Paul - thanks! Some of the explanations for the techniques do seem rather long-winded :)