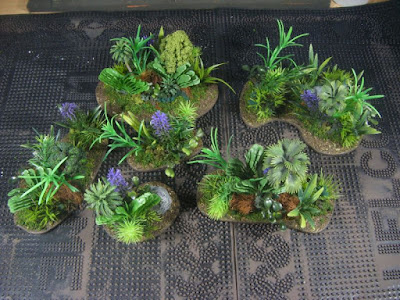
The pic above shows just a part (OK, almost all) of what I've been working on today. It's pretty much all been drudge work to get things ready for later on.
Jungle Test Pieces
Since my Wednesday post I have been working on some test pieces of dense secondary jungle. The first step was to add some mixed dried herbs to the edges of the bases:
Tomorrow I will be airbrushing a brown ink glaze over the more garish vegetation to tone them down. Once the glaze is dry, I will hit them with a spray coat of matt varnish.
I've got a few more bases prepped for some more test pieces:
Some of these have 5mm foam, the rest have 10mm foam. That is to help me decide which is best for holding cocktail stick ends and some of the plants. I might do these as more "open" secondary jungle.
A Box Of Goodies
This box arrived this morning:
And this is what was in it:
Yesterday I began the experiment with the kitchen scourer foam. When I checked them today, apart from the top which was dry, they were still very, very wet. I realised that I had used far too much of the paint/PVA mix for each batch, so I took them back to the kitchen and carefully squeezed out the excess, then left them to dry.
The different sponge colours definitely affect the final colour:
 |
| Clockwise from top left: Yellow, Pink, Grey, Blue |
Painting Base Bottoms
Most of my workbench time today has been spent painting the undersides of bases:
 |
| Terrain bases from Charlie Foxtrot |
 |
| Terrain Tiles from Sarissa Precision |
The terrain tiles are for plantations. I now have enough to do three maximum sized (24" x 24") of them. One will be for bananas, the other two will be for rubber trees or palms. This evening I have been adding MDF "washers" to them (my restock arrived). I got to the final tile and realised that I'd made a mistake on my order - I'd miscounted how many I needed and found that I am 13 short. Oh, well, Warbases will be getting another order from me tomorrow I suppose...
I Love The Smell Of MDF In The Morning...
I've also been prepping some bases for the banana plants and for stands of bamboo:
As the banana plants are a little short, I'm elevating them by gluing a 15mm round base on top of the 25mm base. I then drill through both layers for the pegs on the bottom of the plants to be glued into.
For the bamboo stands, I'm doing something similar, but for a slightly different reason. I drilled a couple of holes into a scrap piece of MDF to see what size holes the bamboo stalks would fit into nicely. I soon realised that I would want a slightly thicker base for them to glue into. So, 30mm bases on 40mm bases. I should be able to get 4-6 stalks onto each.
With my most recent Warbases order, I also got a couple of small pieces for my plantation complex. I assembled them yesterday:
 |
| Whoops! I photographed the rear of the outhouse, not the front! |


Your jungles look excellent Tamsin, all the additional work has really paid off. You have been very busy with all the other prep work you've been doing as well
ReplyDeleteLove the tree/foliage clumps! I can imagine Japanese trops charging past crying 'Bonsai!'
ReplyDeletefantastic Tasmin, I do like the brightly coloured pieces that really brings it to life!
ReplyDeletegood luck with the buildings, I look forward to seeing them
cheers
Matt
@ Dave - thanks! I've taken it easy today after all the busy-ness! :)
ReplyDelete@ Herkybird - cheers! Well, if they are 1:6 scale, these would be "Bonsai!" to them! ;)
@ Matt - thanks! The buildings might be a little while coming - I need to get a small folding table to set up in the shared garden for spray priming. :)
Busy girl. Love the foliage bases, they look really cool.
ReplyDelete