I'm waiting for the extra figures I ordered from The Assault Group to arrive, but decided to crack on and start painting a couple of the support options.

I'm waiting for the extra figures I ordered from The Assault Group to arrive, but decided to crack on and start painting a couple of the support options.
Well, almost finished - They'll need a bit more work on the bases (particularly the Jump Off Point one), decals to be added and maybe some touch-ups.
Uniform Test
 |
| Barrel snapped during prep, so using for a JOP marker |
No, your eyes aren't deceiving you - those are indeed part-painted figures! I decided this afternoon to make a start on some test figures for my late war Germans. As they will primarily be opposition for my British Airborne I reluctantly opted to do them as Waffen SS (*spit*).
Having made that decision, the next one was obviously which SS camouflage pattern to go for. After some humming and haaing, I opted for oak leaf pattern. I'll do the main platoon in the autumn version (with orange dots) and the supports in spring (green dots). Well, apart from the sniper that I'm using as a test model which has been done in autumn.
Before starting the test paints, I did try out a few mixes to get a uniform colour that I'm happy with:
The top row is Feldgau working to Grey Green, the bottom is Feldgrau working towards Dark Sea Green (1:0; 3:1; 1:!; 1:3; 0:1). At the bottom of each swatch are the first and second highlights, made by adding Light Grey and then Sky Grey.
I decided overall that the 1:1 mix of Feldgrau and Dark Sea Green was the best. For uncovered helmets I'll be using a 1:1 mix of German Uniform and Dark Sea Grey.
I was thinking (and somewhat dreading) that I'd have to freehand the various insignia. Then I remembered that I have a decal sheet, although I might need to get another to ensure that I have enough to go around all the support options. I'll still need to freehand the shoulder boards on some figures though...
It's Wednesday and I have remembered to do a workbench post this week! As you can tell from the photo above, I have got the later war Germans primed. I got that finished yesterday.
There was a reason I didn't finish them on Monday - I was out most of the day gaming. I had decided it was about time my ancient Germans got blooded, so I arranged an afternoon and an evening game at the club. The afternoon one was against IanM's Triumvirate Romans, led by Julius himself. The dice were wild for both of us, either one extreme or the other with very few middling rolls. That led to some crazy results once the battle lines clashed. It all came down to the final two combats in one turn - Ian was one point away from breaking and I was two away. I lost the first of those, leaving us both one point off breaking, then the dice gods favoured me - I won it, despite being down a factor, causing Ian's unit to take the cohesion loss I needed to break his army!
Here are some photos of that game:
I completely forgot to do a post on Wednesday - I had photos ready to go, but simply forgot. I could have posted on Thursday, but as that would only have been two days before today...
As you can see, I've been doing something that isn't 3D printing. The figures in the photo above are the start of a Late War German platoon and supports for Chain of Command. Having assessed what I actually have and compared that against what I will need to field them as either standard infantry or Panzergrenadiers (each with an extra squad) and adding some further support teams, I've determined that I need four more MG42 teams (gunner plus loader), at least nine more riflemen, an extra Sergeant/Leutnant type, a "Panzerknacker" team and a medic. Given my preference to avoid too many repeats of the same figure I will probably be placing an order with The Assault Group for the extras.
Having sorted them out on Thursday, yesterday I glued them onto bases. This afternoon I have been adding basing gunk. I will probably do the priming tomorrow.
3D Printing
I did some further sanding at the beginning of the week:
 |
| 240 grit |
 |
| 400 grit |
 |
| 800 grit |
 |
| 1200 grit |
Today I have mostly been...
Running more test prints on the 3D printer. I also made time to give another junk piece a single light coat of filler primer and do some more sanding tests. I took each quarter to a different level of grit - none, 120 grit, 180 grit and 240 grit.
 |
| No sanding |
 |
| 120 grit only |
 |
| 120 and 180 grit |
 |
| 120, 180 and 240 grit |
 |
| No filler primer before sanding |
 |
| Filler primer before sanding |
Apologies for the lack of posts since last Wednesday. Mostly I've been tweaking and testing the printer profiles. I had thought I was almost there, but there are a couple of issues which are still niggling me.
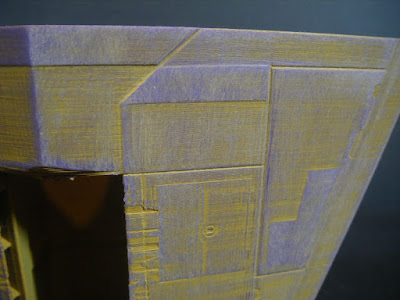
Having printed a few bits for the big project which had defects, I decided that rather than binning them I would put them to use for practicing sanding the prints. In the photo above, the print on the left has had three light coats of filler primer; the one on the right hasn't.
Here are some pics taken after two rounds of sanding, the first with 120 grit, the second with 180 grit.
The airbrush cleaning is almost done - two fully cleaned and re-assembled, one with a few bits that still need cleaning. I might need to replace the needle in my 0.3mm smaller one - I think I must have hit the tip with something.
On the 3D prinitng front, I seem to have resolved the big problem I was having. It seems the cause was a combination of vibrations (reduced by using foam inserts from figure trays under the feet; also by tightening up some of the bolts on the printer's frame) and a couple of settings in the slicer software.
I spotted this afternoon that my first filament spool was running low so I printed a few batches of small items that I'm going to need for a big project. I had just enough for that:
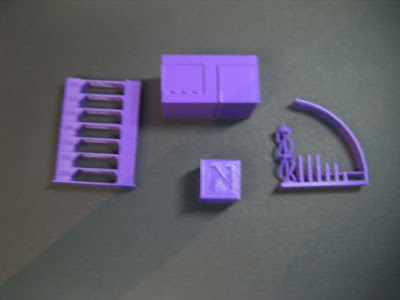
After removing the remaining filament, I did a little bit of maintenance on the printer, then loaded up a new spool of filament - I went with purple. The first job was to run a couple of quick calibration tests, and settings test that I'd forgotten to do on Monday:
 |
| Anticlockwise from left: Temperature tower; calibration cube; "All In One Nano Test"; the supports test |
 |
| Supports test after removing supports |
It seems that I have got my support settings dialed in just about right. The supports came away easily enough with pliers and left clean surfaces with no evidence of sagging.
Yesterday I ran a test-print of a part for the big project I mentioned further up: