Apologies for the lack of posts recently. I haven't really had anything worth posting about until now.
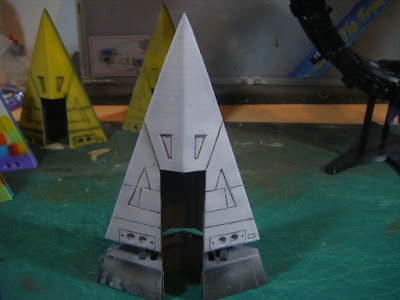
Over the past few days I've been testing out priming, pre-shading and paint schemes for when I paint up my Type S Scout Courier.
I primed a couple of other pieces that hadn't been sanded to test out different colours for the paint scheme:
This was just to see how different colours work together. The brighter colours will be for accents/details; I think I'll go with one of the yellows as the main colour.
I've also done a zenithal prime on a couple of interior pieces to test out colour schemes:
3D Printing
I finally got around to printing the last of the 1:270 scale Traveller ships:
I had to reprint a few parts to replace ones which broker or didn't quite fit. I also had to switch filament spools as I didn't have enough of the black to do the top half. The little bags in front contain a radar dish and various antennae to add later on - I'll need to drill out the holes the antennae go in as they are too snug at the moment. All told, that took about four days to print.
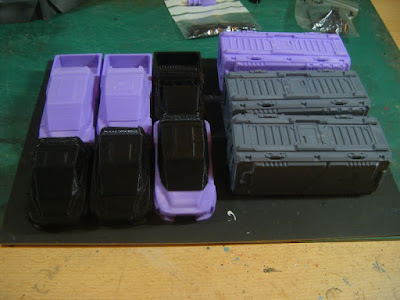
As well as the ship I've printed some more shipping containers (you can never have enough after all) and some air raft variants - the original 2-seater, a 4-seater coupe, a 4-seater saloon and three pick-ups (2-seater, coupe and saloon).
I decided to take advantage of the Black Friday deals on Amazon to stock up on filament, so I've got plenty to keep me going.


Great posting, Tamsin. I'm really enjoying these filament printer posts of yours, as I'm planning on getting one next year for large scenic pieces and dungeon tiles.
ReplyDeleteThanks! Hopefully the lessons I've learned can help you and others avoid the mistakes I've made! :)
DeleteNice test work on the painting Tamsin, and the new ship looks cool, and as you say, can never have too many containers.
ReplyDeleteCheers! The new ship is cool and large! :)
DeleteMmmm, all coming together nicely, a silly question ,the two depressions forward of the hull cut out, are they the bridge windows, and if they are, are they the right way round, I thought they were wide to the back narrow to the front?
ReplyDeleteThanks! The two depressions are on the underside of that piece, just ahead of the fore landing gear housing. From my knowledge of the ship class, they're probably meant to be something to do with the avionics/sensors. :)
DeleteA big project, and yep that means a lot of testing colours etc. I think you may be a while. ;-)
ReplyDeleteI think I've decided on the colours now (and ordered extras of them to make sure I don't run out). :)
Delete