The airbrush cleaning is almost done - two fully cleaned and re-assembled, one with a few bits that still need cleaning. I might need to replace the needle in my 0.3mm smaller one - I think I must have hit the tip with something.
On the 3D prinitng front, I seem to have resolved the big problem I was having. It seems the cause was a combination of vibrations (reduced by using foam inserts from figure trays under the feet; also by tightening up some of the bolts on the printer's frame) and a couple of settings in the slicer software.
I spotted this afternoon that my first filament spool was running low so I printed a few batches of small items that I'm going to need for a big project. I had just enough for that:
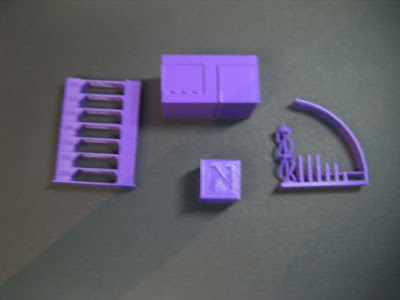
After removing the remaining filament, I did a little bit of maintenance on the printer, then loaded up a new spool of filament - I went with purple. The first job was to run a couple of quick calibration tests, and settings test that I'd forgotten to do on Monday:
 |
| Anticlockwise from left: Temperature tower; calibration cube; "All In One Nano Test"; the supports test |
 |
| Supports test after removing supports |
It seems that I have got my support settings dialed in just about right. The supports came away easily enough with pliers and left clean surfaces with no evidence of sagging.
Yesterday I ran a test-print of a part for the big project I mentioned further up:


Those are looking much crisper prints, I guess using a printer is a bit of a learning curve?
ReplyDeleteThanks! It does take a while to learn the ropes and get high quality prints. :)
DeleteGlad you solved your 3D printer problem. How cool too!
ReplyDeleteThanks! It's good fun messing around with it. :)
Deletenever having used one, do the results need much sanding to remove the parallel lining?
ReplyDeleteI haven't got to that stage yet, but will be testing next week. From what I gather it depends on the layer thickness, print quality, how smooth you want the finish to be. Prepping the model with filler primer, spray putty or varnish before sanding can help a lot.
Delete